Using The New Scheduled Reports in
the iMonnit Online Software
This tech-tip is meant to give instructions for creating and scheduling sensor or network reports in the iMonnit online sensor monitoring software. For product documentation and additional help visit www.monnit.com/support.
Monnit has recently released to Beta a new "Scheduled Reports" feature for our iMonnit online software customers. The scheduled reports function allows users to setup a one time or recurring report to run at a set time. Scheduled reports are sent via email and include a system generated CSV file containing the specified sensor(s) and network(s) data.
To create a new scheduled report, login to your iMonnit account at https://www.imonnit.com.
Clicking on "Reports" in the main navigation will bring you to the reports section of the iMonnit system.

Select "Schedule New" from the left navigation on the Reports page to create a new scheduled report.
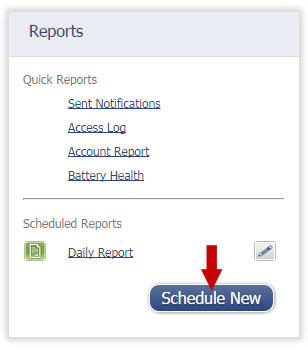
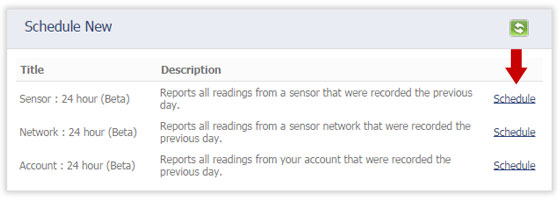
Click on "Schedule" next to the type of scheduled report you want to create.
Sensor : 24 hour - Reports data from a specific sensor for the previous 24 hours.
Network : 24 hour - Reports data from all devices in a specific network for the previous 24 hours
Account : 24 hour - Reports data from all devices on the entire account for the previous 24 hours.
Name the report and select the schedule and time of day to run the report, then select all other options that you want to include in the report. When you are finished, click the "Save" button.
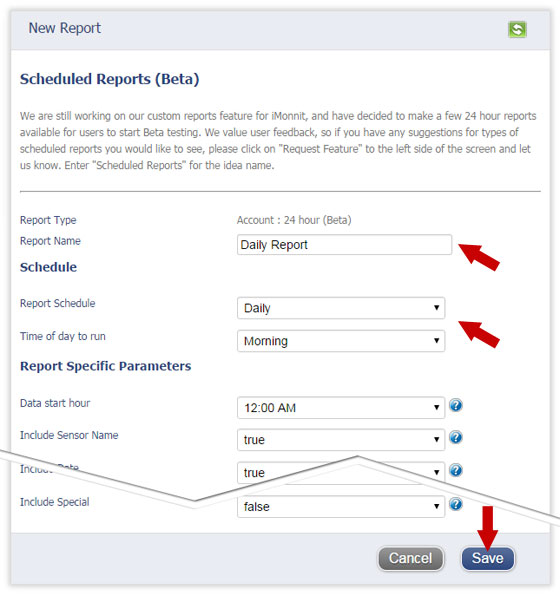
You can also choose to send the report immediately by choosing the option under "Report Schedule". Choosing the immediate report option generates a one-time report and sends it to the specified email.
After clicking the "Save" button, you will see a verification page for the report settings. At the bottom of this page you can select user's on the account to receive the report. If you are using the free iMonnit software there will be no other user's on your account. By default the logged in user creating the report is already added. To select additional user's, check the box in front of their name and click the arrow button to move the users to the recipient list.
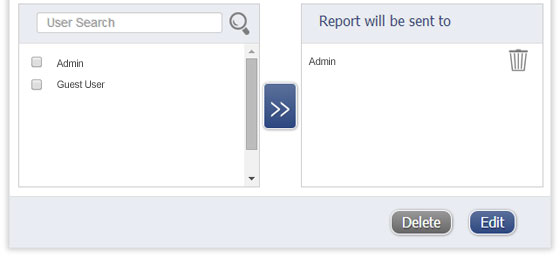
Any time a recipient is added or deleted, the list is automatically saved and the report remains active.
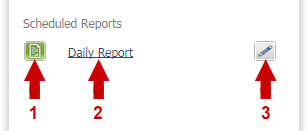
With the report created you can Activate/Deactivate the notification by clicking on the report icon in the left navigation (1). You can also view the report settings and edit which users will receive the report by clicking on the report name (2), and can make changes to the report settings by clicking the edit icon (3).
For more information on using Monnit wireless sensors, visit the support section of our website.
back to top
|


