Using The New Notifications Features of
the iMonnit Online Software
This tech-tip is meant to give instructions for creating and editing sensor or gateway notifications in the iMonnit online sensor monitoring software. For product documentation and additional help visit www.monnit.com/support.
A few weeks ago, we updated our iMonnit online software to include some new features. Some of the new features have to do with how notifications are created and managed.
Notifications for a single sensor can be created, deleted or edited by clicking the "Notifications" tab in a sensor's detail view.
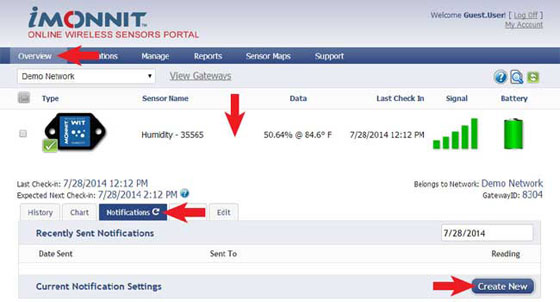
Notifications can be created, deleted or edited for any sensor or group of sensors by clicking on "Notifications" in the main menu.

When creating a notification, you will need to select the type of notification to create.

Sensor Reading Notification - Reading notifications are sensor specific (i.e. water sensor = trigger alert when water present, temp sensor = trigger alert when temp is above 70F, etc.). When creating a sensor reading notification, you will need to choose the sensor type you are creating the alert for. The select box will only show sensor types that are currently being used on your sensor network.
Battery Notification - Allows users to define a battery power percentage level that will trigger an alert from the system, warning them to replace batteries.
Inactivity Notification - Set-up “Inactivity” notifications to alert you when your sensors have stopped communicating with the servers. Failure to set up an “Inactivity” notification will result in no email/SMS text being sent should your sensors stop communicating with the servers.
Advanced Notifications - Allows the user to set notifications based on advanced rules, such as comparing past data points with the current one to determine if a notification should be sent.
Existing Notifications - Use notifications that have already been created on your account with the selected sensor.
Notification Settings
This area allows the user to set notification parameters such as naming the notification, customizing the notification message and setting sensor conditions that will trigger the notification.

People to Notify
The list on the left shows all available users on the account. You can type into the search box to filter large lists of users. Select the user(s) to receive the notification and click the arrow button to add them to the recipient list. By default, email notifications are activated. Clicking the notification delivery method icon toggles them on and off (green is on, grey is off). If the user should receive text message notifications, click on the phone icon to turn it green.

Sent From
Allows you to assign devices (sensors and gateways) that will cause the notification to be sent. When a notification is sent from the system, it will automatically include the device name and the data that caused the notification to be sent. A single notification can be assigned to multiple sensors or gateways. Sensor reading notifications can only be assigned to sensors of the same type. General notifications such as “battery status”, can be assigned to any or all sensors.

Devices to Notify
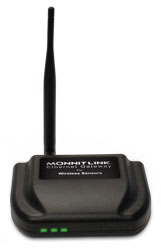
If you have a Monnit Control or Notifier A/V device on your network, you will also see a “Devices to Notify” tab. This will allow the notification to interact with these types of devices. Select a device from the list on the left and click the arrow button to add it to the recipient list. Clicking the control icon toggles their setting.

Note: Control devices have two relays per device that are controlled separately. You can turn a relay on, off or toggle the state. You can also set a duration by clicking on the timer icon. This will perform the selected toggle (on/off/toggle) for a set duration, then change back.
For more information on using Monnit wireless sensors, visit the support section of our website.
back to top
|


