Using Monnit Control
This tech-tip is meant to give to give some suggestions for installing and using the new Monnit wireless control. For product documentation and additional help visit www.monnit.com/support.
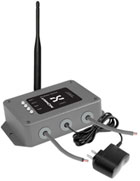
 Monnit Wireless Control allows a user to control either two separate 10-amp or two separate 30-amp relays, all through the iMonnit online sensors portal. Each of the unit's two relays (controls) can be toggled on/off by a paired wireless sensor (currently over 40 types) on the same network, or directly by the user through the iMonnit.com web portal. Monnit Wireless Control allows a user to control either two separate 10-amp or two separate 30-amp relays, all through the iMonnit online sensors portal. Each of the unit's two relays (controls) can be toggled on/off by a paired wireless sensor (currently over 40 types) on the same network, or directly by the user through the iMonnit.com web portal.
Adding Monnit Control to Your Sensor Network
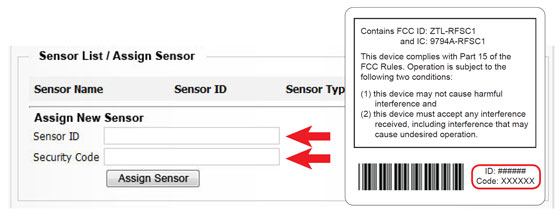
The control unit is added to the network like a sensor is. Do not power it on until it has been assigned to a network. From the iMonnit portal enter the ID and the Code.
• Choose "Manage" from the main navigation.
• Select the network you would like to add the control unit to.
• Find the bottom of the section "Sensor List / Assign Sensor".
• Enter the ID and Security Code from the back label of the control unit.
• Press the "Assign Sensor" button.

Once the control unit has been added to your network and before connecting the relay wires to any equipment, power on the control unit. Check that the bottom two LED indicators are illuminated green. In the iMonnit online software, verify that data is being received by viewing the history tab in iMonnit.

Connecting the Relays
The relay acts as a switch on the line for your power source. The relays are by default NORMALLY OPEN, so there is no connection. (Indicator lights for the relays will be off to indicate this). Return to the edit page if you want the default state to be NORMALLY CLOSED.
The relay is just allowing the current to pass through, so it will be installed inline on the power wire. It is not connected to power and ground.

Naming and Pairing Control Relays with Wireless Sensors
Each of the unit's two relays can be paired with any Monnit wireless sensor (currently over 40 types) to activate the relay when the sensor detects user defined conditions (using the "Aware" state). To pair a relay with a wireless sensor, enter the sensor's ID from it's bottom label.
The control device will listen for messages from the iMonnit software, if a sensor reading meets the "Aware" state conditions, the control relay will automatically switch to the non-default state. When the sensor reports a reading outside of the "Aware" state conditions, the relay will switch back to it's default state.

On Demand Relay Control
To test the functionality of the relays when connected to equipment, go into the iMonnit portal, click on the control unit information bar from the overview page, then click the "Control" tab:

Use the drop down to elect to turn the relay ON (close it), OFF (open it) or toggle the state. Once a selection is made, another field will appear allowing you to set a duration of time in seconds that the relay should be activated as commanded, after which it will switch back. If you want to simply switch the relay without a set time to switch back, leave the field empty.
Once the Send Control command is sent, it will take the combined time of the gateway heartbeat and the poll interval to affect the relay. To speed up the process, force the gateway to communicate with the server and/or lower the poll rate (in the Edit tab).
For more information on using Monnit wireless sensors, visit the support section of our website.
back to top
|


